quiver笔记基本tips
- 整洁
- 内容正确
内容全面
可以在 finder 里面 直接复制 文件名 就可以 在quiver 中使用。
有零散的笔记,零时笔记,都放入, Inbox 里面。
以后慢慢 整理成体系 , Inbox 应该是最重初的内容,也应该是最多的笔记。
切记。
零散笔记,都应该放入inbox 里面.
个人整理笔记布局方法,把每一个cell看作是 单一功能的函数好好,利用锚点定位,有利于以后整理,可读性是第一位的。
MWeb 排名 appshoper
markdown syntax
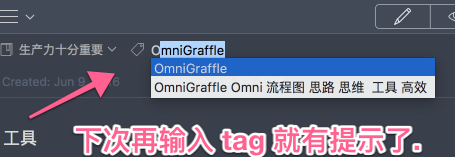
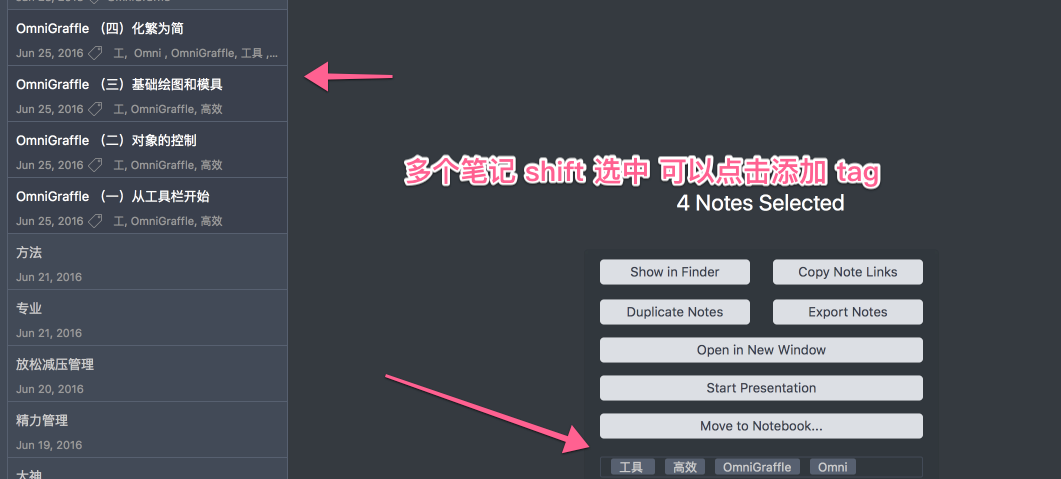
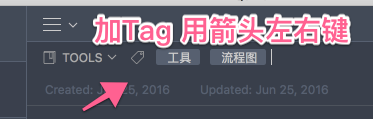
加 Tag
输入文字后按回车就能加标签 tag.
颜色控制
|
|
short cut
Command + Opition + “↑” 当前cell向上移动
鼠标
double click notelist title 单独成一个window
中间
自己在 markdown上看到 center 必须在前 是不是 符合css 位置 大小 内容 动画 其它的路子?
这个是在简书上看到的, 一个markdown 语法。
http://www.jianshu.com/p/5e1690ffede6
亲测 以上语法不支持 Github ,目前支持 Quiver. 自己用sublime 测试markdown 预览 github 加<mark>对效果没有影响,挺好. 可以放心用这个标记了
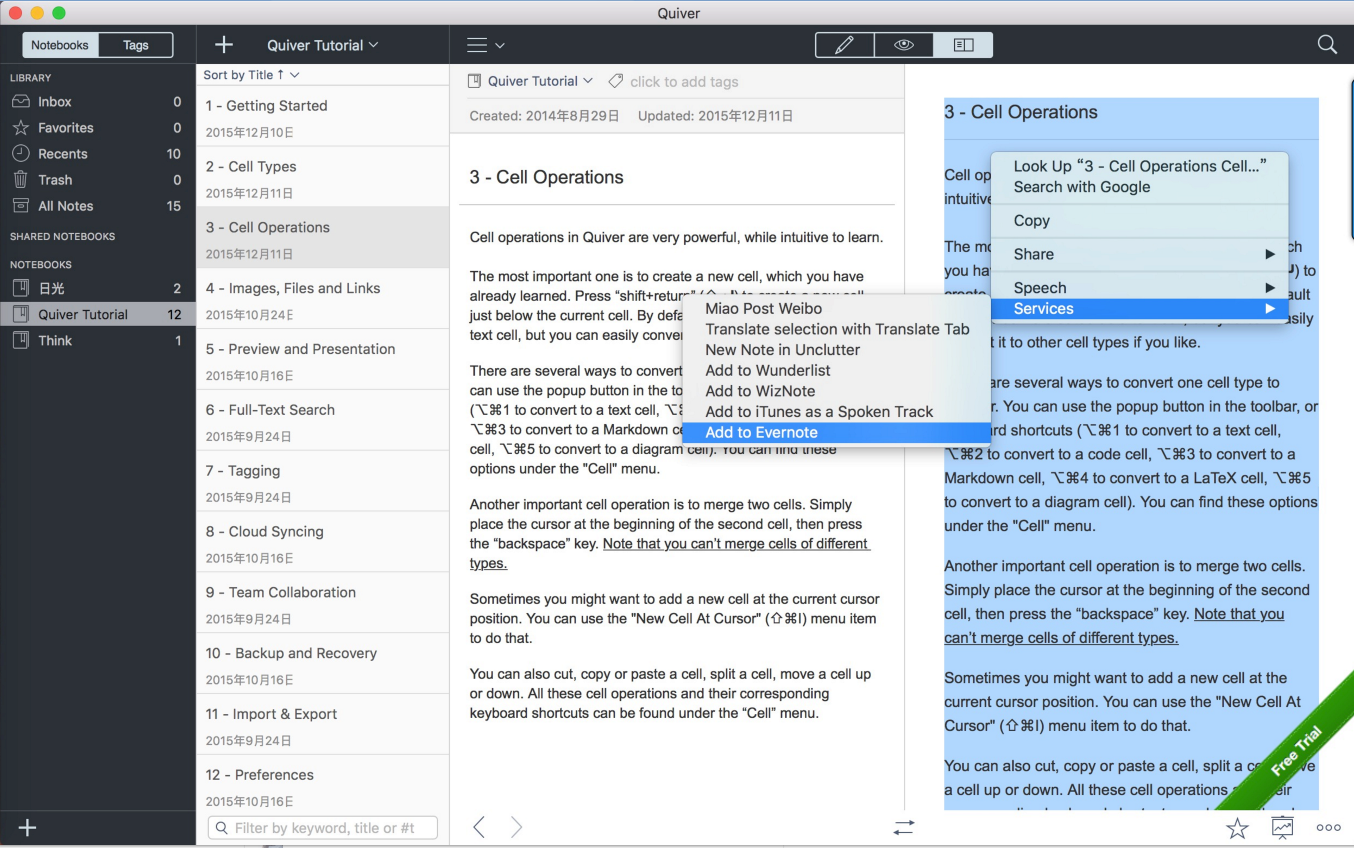
印象笔记互动
另外在预览页面全选,还可以用服务导入到 evernote
作者:阿阿阿面
链接:https://www.zhihu.com/question/28886671/answer/76360988
来源:知乎
著作权归作者所有。商业转载请联系作者获得授权,非商业转载请注明出处。
另外在预览页面全选,还可以用服务导入到 evernote
测试网上的流程图md 语法
个人流程图 展示

GitHub writer
Symbols that should possibly not be used in the text: ‘=>’ and ‘->’ and ‘:>’ and ‘|’
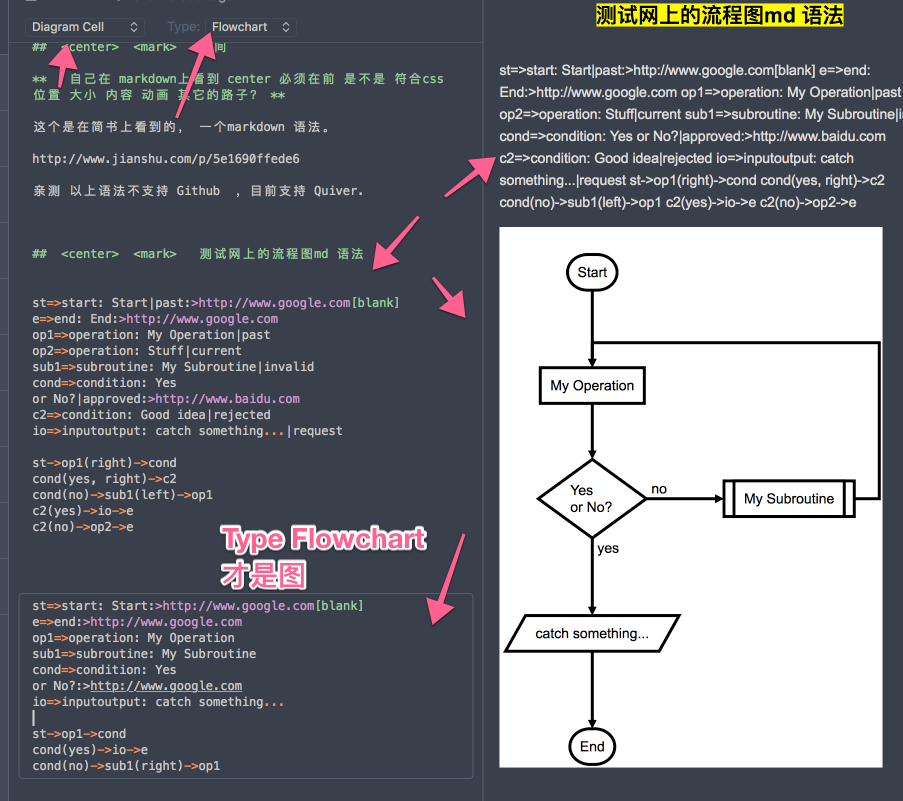
定义元素阶段的语法是
tag=>type: content:>url
tag就是一个标签,在第二段连接元素时用
type是这个标签的类型,从上段内容看有6中类型,非别为:
start
end
operation
subroutine
condition
inputoutput
content就是在框框中要写的内容,中英文均可,但有一点需要特别注意,就是type后的冒号与文本之间一定要有个空格,没空格会出问题。
url就是一个连接,与框框中的文本相绑定
连接元素阶段的语法就简单多了,直接用->来连接两个元素,需要注意的是condition类型,因为他有yes和no两个分支,所以要写成
c2(yes)->io->e
c2(no)->op2->e
这样的格式。
|
|
|
从网上找了很久关于markdown语法的文章,机会微乎其微,大多所指向的都是同一个页面https://github.com/adrai/flowchart.js
这是github上的一个开源项目,里面对我有用的只有一小段文字
|
|
由于墙的原因,也没法找到什么有用的外文资料,只能总结一下此段代码里面的语法了。
流程图的语法大体分为两段,第一段用来定义元素,第二段用来连接元素
定义元素阶段的语法是
tag=>type: content:>url
tag就是一个标签,在第二段连接元素时用
type是这个标签的类型,从上段内容看有6中类型,非别为:
start
end
operation
subroutine
condition
inputoutput
content就是在框框中要写的内容,中英文均可,但有一点需要特别注意,就是type后的冒号与文本之间一定要有个空格,没空格会出问题。
url就是一个连接,与框框中的文本相绑定
连接元素阶段的语法就简单多了,直接用->来连接两个元素,需要注意的是condition类型,因为他有yes和no两个分支,所以要写成
c2(yes)->io->e
c2(no)->op2->e
这样的格式。
下面为显示情况如果IE浏览器显示不好,可以使用chrome试试。
|
|
Markdown流程图语法
字数272 阅读525 评论1 喜欢1
概述流程图的语法大致分为两部分。
- 定义元素
- 连接元素
定义元素
|
|
- tag:标签,用于连接元素时使用
type:该标签的类型。共有6种类型如下:
start
end
operation
subroutine
condition
inputoutputcontent:流程语句中放置的内容
- type:与content之间一定要有一个空格,否则会出问题!
4.url:链接,与流程语句绑定
连接元素
使用->符号,如:
|
|
实例
牢记tag=>type: content:>url
|
|
switch 流程图画法
|
|
Quiber实现技巧
st->op1(right)->cond (一个流程后面可以跟小括号+英文方向值)
注意
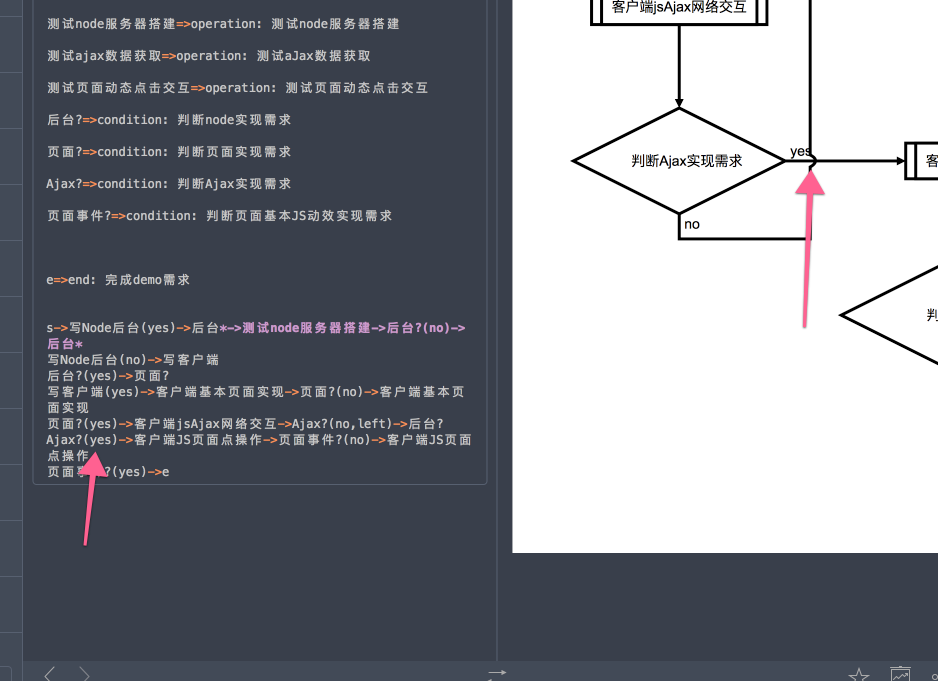
s->写Node后台(yes)->后台->测试node服务器搭建->后台?(yes)->写客户端(yes)->客户端基本页面实现->页面?(yes)->客户端jsAjax网络交互->Ajax?(yes)->客户端JS页面点操作->页面事件?
页面事件?(yes)->成功->实现需求
页面事件?(no)->客户端JS页面点操作
Ajax?(no)->客户端jsAjax网络交互
页面?(no)->客户端基本页面实现
后台?(no)->后台
!!!
流程连线 尽量不要换行不要有多余的 \s 要不然会出问题的
流程图不能显示完整
不能导出完整的流程图 需要特别注意 PDF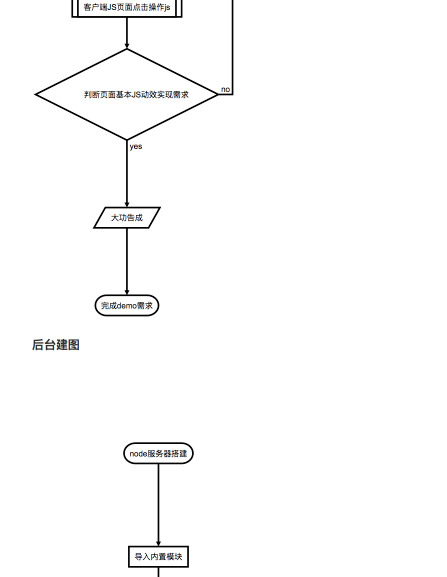
流程图技巧http://chuansong.me/n/384012849440
MarkDown 是一门轻量级标记语言,深受喜欢写作和程序员的喜欢。具有良好的排版设计,专心写作;语法高亮、全键盘操作、学习成本低等等优点。过去推送的文章,我我都是在 MarkDown 上面完成,然后保存在印象笔记上面,再贴到微信公众号上,基本不用再去调整页面的排版问题。
MarkDown 语法的学习成本非常的低,只需要找一篇教程学习十几分钟就可以用它来写文章了。很多人都是用 MarkDown 进行写作,所以掌握了基本的排版语法就可以了。但是 MarkDown 还有一些比较少用到的功能,比如流程图等等。因为网络上面的很多教程并没有针对流程图作很详细的讲解,所以很多人不太理解 MarkDown 流程图的语法实际含义,所以今天就来写写 MarkDown 的流程图。
流程图我们经常见,专门专对流程图的工具也很多,我们甚至完全不需要用 MarkDown 画流程图,只需要用流程图软件完成之后生成图片贴上去就可以了。但是在 MarkDown 作流程图还是有好处的,第一是针对简单的流程图比较方便,直接生成;第二是可以强化做流程图的思维和思路。
MarkDown 流程图语法主要由三部分组成,流程图语块定义、流程图符号声明和流程处理。下面是一个简单的流程图示例,通过示例讲解一个流程图各个组成部分。
|
|
生成流程图的实际效果如下:
第一部分,流程图语块的定义。在 MarkDown 语法里面,可以像定义代码块一样定义一段内容为流程图(Flow chart)。具体操作就是将流程图语法内容写在
除了调整流程图的方式之外,还可以在流程图符号生面后面加上需要跳转的连接,比如:
st=>start: 开始:>www.google.com
这段代码就是可以给流程图的开始符号添加一个调转连接,但是不是说有的 MarkDown 编辑器都支持这个功能,目前来说像作业部落这些在线编辑器是支持这些功能的。
MarkDown 的流程图语法相对简单,但是想要用好就需要多加练习,强化自己对于流程图的思维能力。使用 MarkDown 制作流程图,就如同程序员使用代码去构建一个个功能一样,看着那些由英文符号转化而来的图形,总能让自己心满意足。
http://chuansong.me/n/384012849440
GitHub 项目 支持
流程图
https://github.com/adrai/flowchart.js
Usage
On your page you need to include raphael like so:
or
npm install flowchart.js
and then
|
|
Advice
Symbols that should possibly not be used in the text: ‘=>’ and ‘->’ and ‘:>’ and ‘|’
theme
自定义theme路径
/Users/lilonglong/Library/Containers/com.happenapps.Quiver/Data/Library/Application Support/Quiver/Themes